How to make a fake tsantsa |
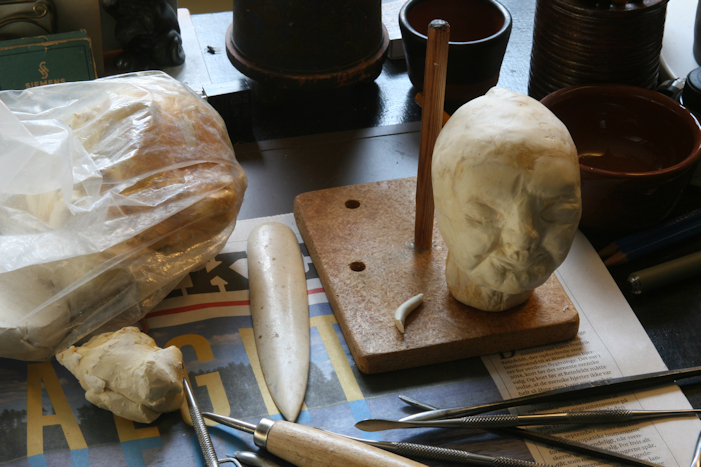 |
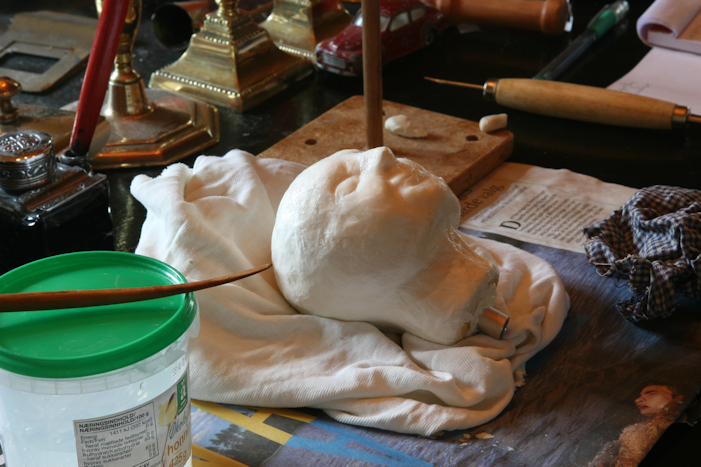
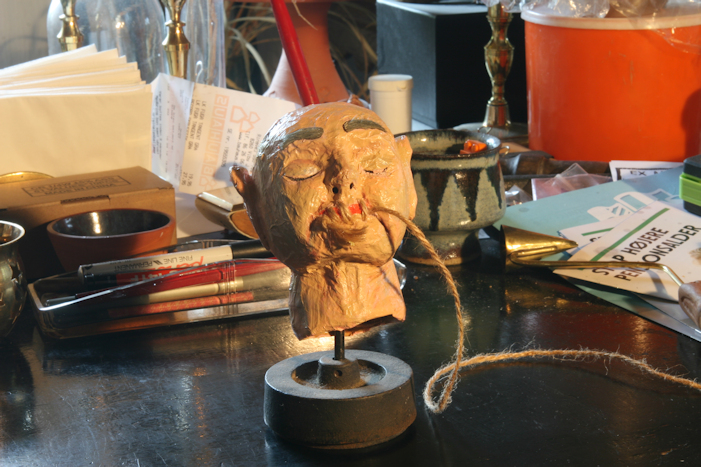
I start with sculpting a core mould in plasticine. The details must be very prominent as they tend to get less visible as I put layers on the core. I use modelling tools for clay work, these can be bought rather cheaply or made from iron or wood. You do not need that many. In this case I made a hole in the neck with a metal tube so that I can put the head on a stand and view it. |
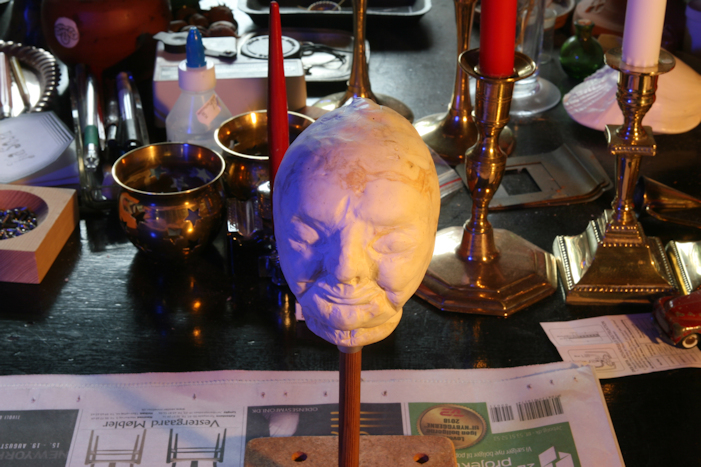 |
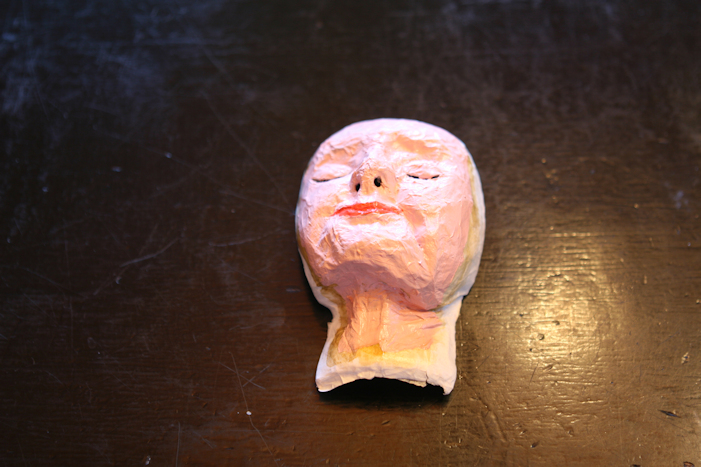
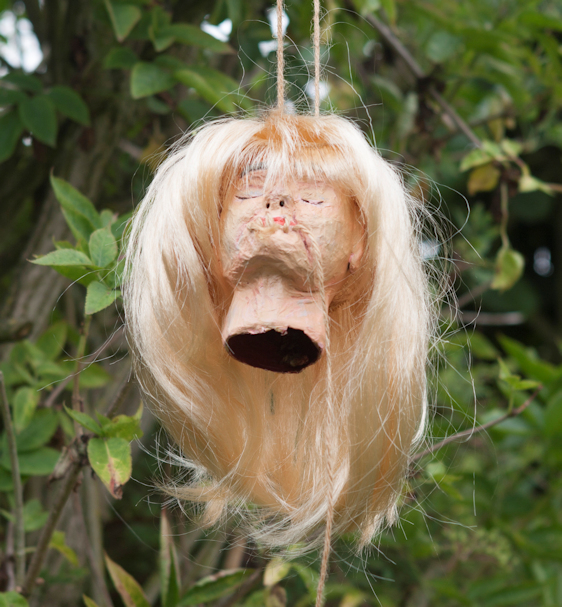
I have photographed the model with coloured side lighting to make the details stand out. The details are exaggerated even caricatured (it bears some resemblance to a certain person). Details like mouth and nose are enlarged as it seems that on a real tsantsa they do not shrink to the same proportions as the rest of the head. |
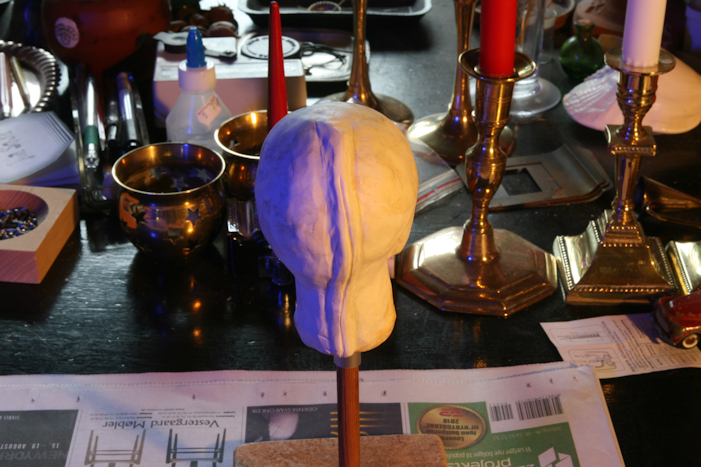 |
On the backside I make a raised boss that will look like the skin has been stitched together. When making a real tsantsa the skin is cut open in the back and flayed of. It is then stitched together before shrinking starts. |
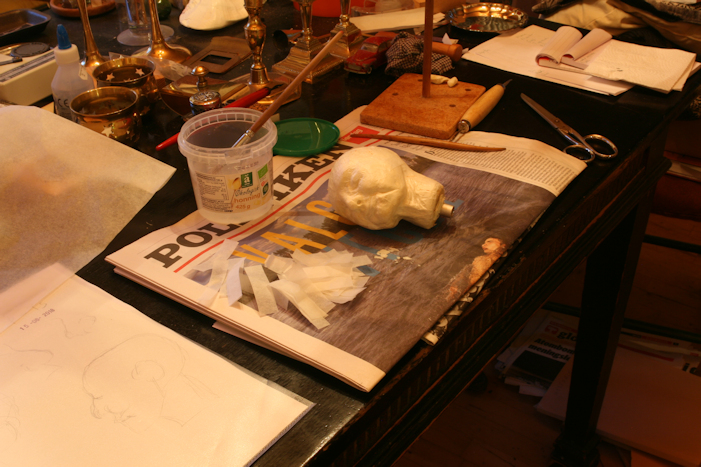 |
The core is covered with layers of fine paper on the face and perhaps newspaper on the rest. Tear or cut the paper into narrow strips about 1 cm wide and about 6 or 7 cm long. Newsprint should be pasted over with paste and left for a few minutes to soften the paper before being put on the model. I use methyl cellulose paste as this does not tend to rot. Take care not to put the strips on in the same direction, have them cross each other. This makes the figure stronger and diminishes deformation when drying. When a strip is placed on the figure, cover it with a thin layer of paste. Have the figure dry before applying another layer of paper. |
 |
It might be nescessary to draw up the lines of the mould with a pointed stick or the bristles of the paste brush. The face needs a thinner layer and more care on details than the rest. |
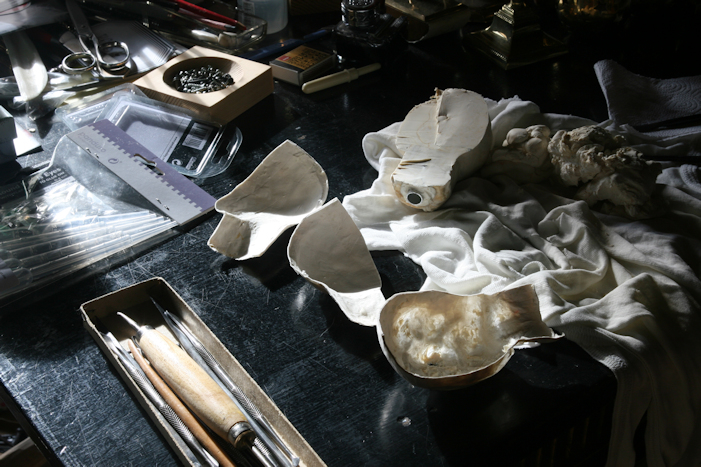 |
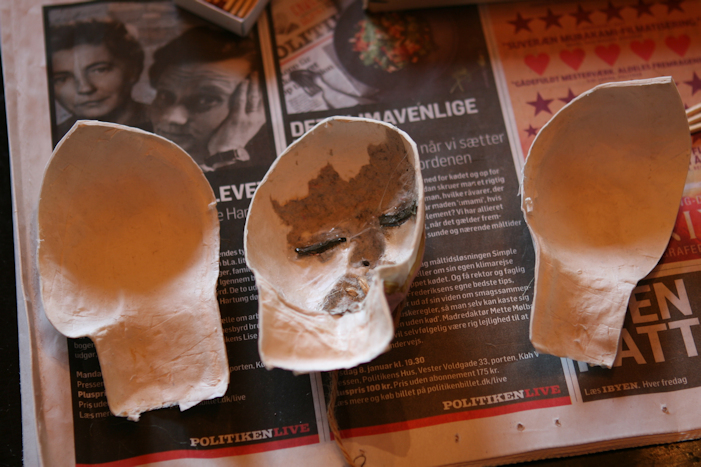
When the shell is sufficiently thick and thorougly dry, it is cut into 3 parts. Cut where the ears will be and at the back of the head and neck. The plasticine is removed. A potters loop can be used for this work. In this case parts of the face were too thin and had to be reinforced from behind. This did cause some deformation but I don't think that it was too bad. |
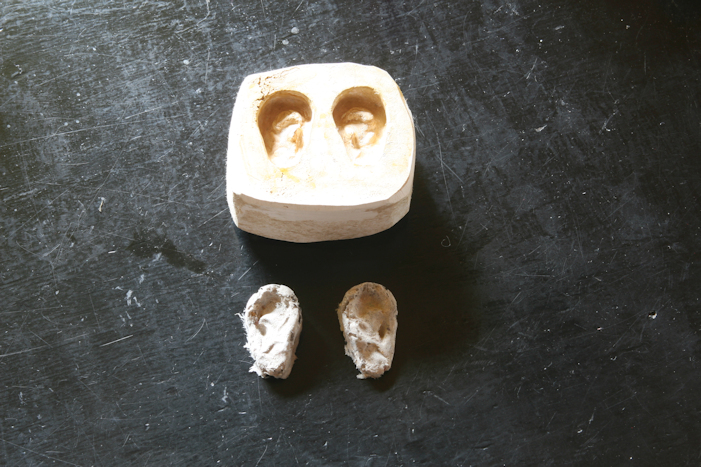 |
The two ears are cast in a mould of plaster of Paris. That mould was made as a cast of two ears made in plasticine. They have to be simplified somewhat. They are cast in paper pulp (can be made by grinding or whipping newsprint in water with a motor, straining off the surplus water and adding paste). When the ears are dry, they can easily be removed, as they shrink a lot. Then they are carefully sanded with fine sanding paper to round the edges. The ears should be made rather large, as they do not shrink like the rest of the head on a real tsantsa. |
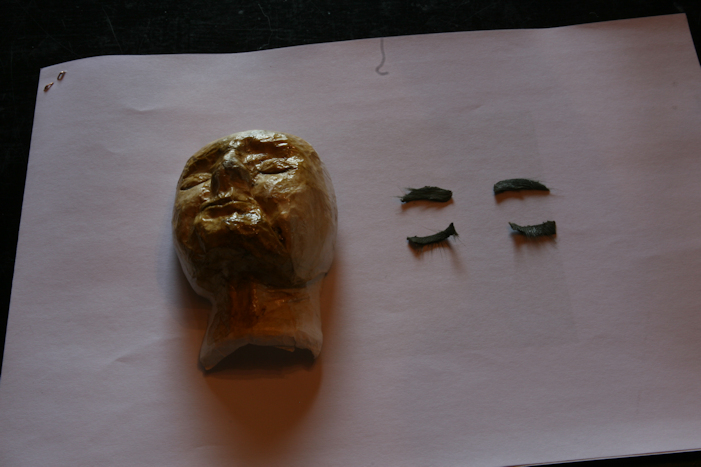 |
The face has got some shellac. Slits have been cut under the eyelids. Pieces of rabbit fur (those parts that have short hairs) are cut to be used for eye brows and eye lashes later. |
 |
The face has been roughly painted with oil paint (acrylic paint would probably do just as well). I do not care about details now but I need to have the mouth and the parts around the eyes painted now as this will be difficult later. The nostrils have been cut with a pointy knife. |
 |
On the inside of the eyelids i glue two strips of coarse rabbit fur and pull some of the hairs through the slits (with a needle or bodkin). It does not quite look natural. |
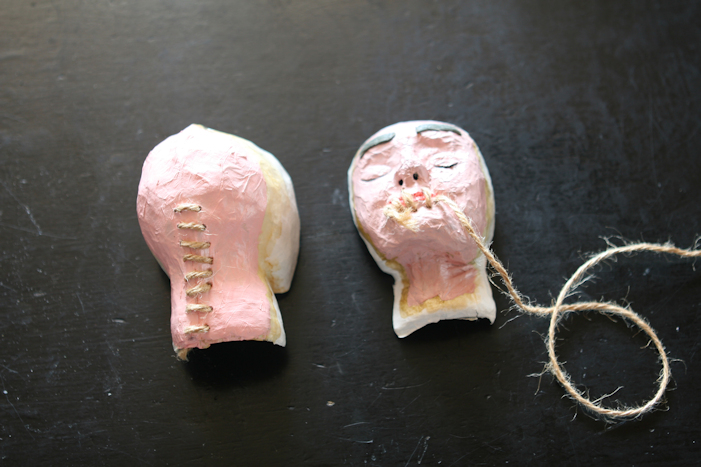 |
The mouth of a tsantsa is stitched together, probably so that the soul of the dead enemy may not escape. A piece of twine or yarn can be used. I have pulled out some fibres to make it look more primitive. Be sure not to use a synthetic yarn as this will look out of place. Use a heavy needle and perhaps a bodkin. One end of the yarn shall be long and hang down. The two back parts of the head are assembled with paper strips on the inside. In the back a fake suture is made like on the mouth. I do not need to take the stiches all the way up as the top of the head will be covered with a wig. In fact the back of the neck will be completely covered in this case. But if one makes a fake tsantsa with short hair og perhaps a bald one then the suture is an important detail. |
 |
The individual parts of the head are assembled with paper strips and paste, both on the inside and the outside. If they do not quite fit together paste over the gaps. The ears are glued in place with pva-glue. Use pins to fix them as the glue dries. If the ears do not fit exactly (they probably do not) then fill the gaps with pulp. When dry give it some shellac and then start painting. A base colour (in this case a somewhat natural skin colour but a real tsantsa would be rather dark from soot and ashes). Add gruesome details like dark or purple spots and so on. When the paint has dried, cut a cheap party wig down in size and glue it on top of the head. It will be nescessary to dress it up a little like cutting the hairs covering the face away. A short haired tsantsa is also a possibility. As the last thing a loop of twine is mounted in the scalp so that the fake tsantsa can be hung and displayed. |
 |
|
|
(c) Ditlev V. Petersen/Potemkin 2019 |